Timex Clock Radio Manual: A Comprehensive Guide
This manual provides detailed instructions for Timex clock radio models like T232W, TW500, T1305BX, and T232B, covering setup, features, and troubleshooting steps.
Timex clock radios are renowned for their reliability, user-friendly design, and blend of classic functionality with modern conveniences. These radios cater to a diverse range of needs, from simple bedside alarm clocks to models equipped with wireless charging and advanced features like USB ports for device charging.
Popular models, such as the T232W (white), TW500 (wireless charging), T1305BX (hotel-focused), and T232B (black), demonstrate Timex’s commitment to providing practical solutions for everyday life. They often include features like dual alarms, FM radio presets, adjustable display brightness, and battery backup for uninterrupted operation. This guide aims to provide comprehensive support for setting up, operating, and maintaining your Timex clock radio, ensuring a seamless and enjoyable experience.
Popular Timex Clock Radio Models
Timex offers a variety of clock radio models designed to suit different preferences and needs. The Timex T232W (White) is a standard bedroom model featuring FM radio and USB charging. For those seeking modern convenience, the Timex TW500 boasts wireless charging capabilities alongside dual alarms and FM presets.
The Timex T1305BX is specifically engineered for hotel and lodging environments, offering durability and essential features like a pre-set clock and USB charging ports. Lastly, the Timex T232B (Black) provides the core functionality of a reliable alarm clock with a sleek, black finish. Each model incorporates Timex’s signature Amber-Glo display and battery backup, ensuring consistent performance.
Timex T232W (White) ─ Features Overview
The Timex T232W is a popular choice for a simple and reliable bedside clock radio. It features a clear FM radio with easy scanning capabilities, allowing users to tune into their favorite stations. Conveniently, it includes a USB charging port for powering up mobile devices overnight.
This model offers a standard buzzer alarm, providing a traditional wake-up experience. The Amber-Glo custom display offers adjustable brightness, ensuring comfortable viewing in any lighting condition. Battery backup functionality guarantees that your time and alarm settings are preserved even during power outages. It’s a straightforward, functional, and affordable option for everyday use.
Timex TW500 ─ Wireless Charging & Advanced Features
The Timex TW500 elevates the clock radio experience with integrated wireless charging for compatible smartphones. Beyond charging, it boasts dual digital alarms, enabling customized wake-up routines for different schedules. Users can select from 10 FM presets to quickly access preferred radio stations.
A dimmable display ensures comfortable viewing in darkness, while a sleep timer allows for automatic radio shut-off. Battery backup safeguards time and alarm settings during power interruptions; This model combines convenience and functionality, offering a modern solution for bedside organization and a personalized wake-up experience. It’s a step up in features and technology.
Timex T1305BX ― Hotel/Lodging Focused Model
The Timex T1305BX is specifically designed for hotel and lodging environments, prioritizing durability and ease of use for guests. It features two USB charging ports, allowing simultaneous charging of mobile devices – a crucial amenity for travelers. Guests can wake to either FM radio or a traditional buzzer alarm.
An Amber-Glo custom display with dimmer control provides clear visibility without being overly bright. Battery backup ensures the clock maintains accurate time and alarm settings even during power outages. This model often includes a pre-set clock function for simplified setup and maintenance by hotel staff, making it a reliable and practical choice.
Timex T232B (Black) ─ Standard Features & Design
The Timex T232B, finished in black, offers a classic clock radio experience with essential features. It combines FM radio functionality with dual alarms, allowing for customized wake-up routines for two individuals. A built-in USB charger conveniently powers smartphones and other devices overnight.
The radio boasts a large, easy-to-read display, complemented by a sleep timer and a snooze function for a more relaxed wake-up experience. Users can personalize their sleep routine with these versatile options. The Timex T232B is designed for simplicity and reliability, providing a dependable alarm and entertainment solution for any bedroom.
Setting Up Your Timex Clock Radio
Initial setup is straightforward. First, plug in your Timex clock radio to a power outlet. The display will illuminate, prompting you to set the current time. Use the designated ‘Hour’ and ‘Minute’ buttons to accurately adjust the time. For optimal FM radio reception, extend the antenna fully and position it for the best signal.
After setting the time, you can begin scanning for available FM radio stations. Press and hold the ‘Scan’ button, and the radio will automatically search for and store stations. Once complete, you can cycle through your saved presets using the tuning controls. Ensure proper placement for both power and antenna connections for reliable operation.
Initial Power-Up and Time Setting
Upon plugging in your Timex clock radio, the display should activate, potentially showing a default time or prompting immediate time setting. If prompted, use the ‘Hour’ and ‘Minute’ buttons – often labeled with up/down arrows – to adjust the current time accurately. Some models may require holding these buttons for faster adjustment;
Confirm your settings by pressing a designated ‘Set’ or ‘Enter’ button. Verify the displayed time against a reliable source. If the clock doesn’t automatically synchronize to the correct time, ensure the power connection is stable. A brief power interruption can sometimes reset the time, necessitating re-setting.
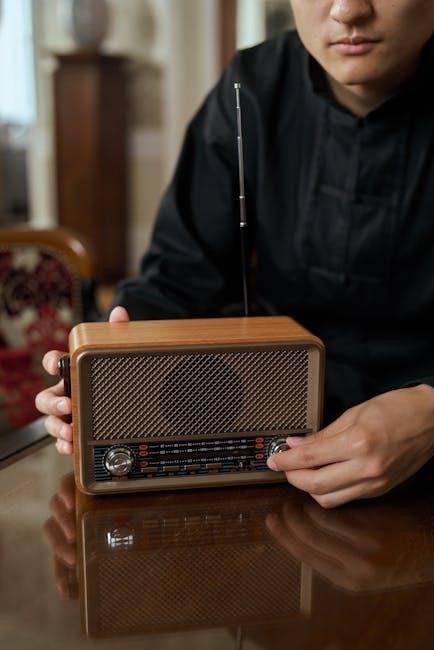
FM Radio Setup and Scanning
To access FM radio, press the ‘Radio’ or ‘FM’ button on your Timex clock radio. The unit will typically begin scanning for available stations automatically. If automatic scanning doesn’t initiate, locate and press the ‘Scan’ or ‘Auto Scan’ button. The radio will cycle through frequencies, stopping briefly at each station it detects.
To manually tune, use the ‘Tune’ or arrow buttons to navigate between frequencies. Once a desired station is found, press the ‘Preset’ or ‘Memory’ button to save it for quick access later. Many models offer up to 10 preset slots. Refer to the ‘FM Presets’ section for detailed saving instructions.
Using the Alarm Features
Timex clock radios excel in alarm functionality, often featuring dual alarms for separate wake-up times. To set an alarm, press the ‘Alarm Set’ button, then use the hour and minute buttons to input your desired wake-up time. Select your preferred wake-up source: ‘Radio’ for waking to your favorite FM station, or ‘Buzzer’ for a traditional alarm sound.
The ‘Snooze’ function, activated by pressing the ‘Snooze’ button, provides a brief extension to your sleep. The snooze duration is typically around 9 minutes. Remember to consult your specific model’s instructions for precise button labels and feature locations.
Setting Dual Alarms
Many Timex clock radios, such as the TW500 and T232B, offer the convenience of dual alarms – Alarm 1 and Alarm 2. This allows for two independent wake-up times, ideal for couples with differing schedules or for weekday/weekend alarm settings.
To set the first alarm, press the ‘Alarm 1 Set’ button and follow the time-setting procedure. Repeat this process using the ‘Alarm 2 Set’ button for the second alarm. Ensure you select the desired wake-up source (radio or buzzer) and volume level for each alarm individually. A clear indicator on the display will show which alarm(s) are currently active.
Wake-Up Options: Radio vs. Buzzer
Timex clock radios typically offer two primary wake-up options: a traditional buzzer sound or the FM radio. Selecting your preferred method is usually done during the alarm setting process. To wake to the radio, ensure a station is tuned in and select the ‘Radio’ option within the alarm settings. The radio will automatically turn on at the set alarm time.
If you prefer a more direct wake-up call, choose the ‘Buzzer’ option. The buzzer sound usually has adjustable volume levels. Experiment to find a setting that effectively wakes you without being jarring. Some models, like the T1305BX, clearly indicate the selected wake-up source on the display.
Snooze Functionality
The snooze function on your Timex clock radio allows for a few extra minutes of sleep before fully waking up. Typically, pressing the ‘Snooze’ button will temporarily silence the alarm, and it will reactivate after a pre-set interval – usually around 9 minutes, though this can vary by model. Repeatedly pressing the snooze button will continue this cycle.
To disable the snooze function entirely, you may need to consult your specific model’s instructions. Some radios have an option to turn off snooze within the alarm settings. Be mindful of relying heavily on the snooze feature, as it can disrupt your sleep cycle and leave you feeling groggier.

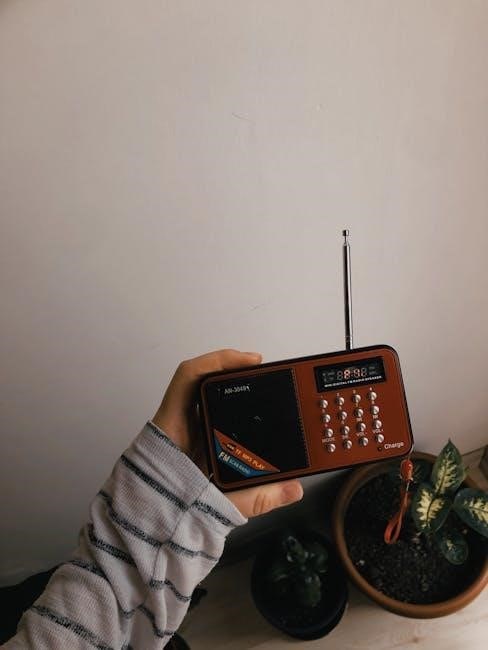
USB Charging Capabilities
Many Timex clock radio models, such as the T232W, T232B, and TW500, feature integrated USB ports for convenient device charging. These ports allow you to charge smartphones, tablets, or other USB-powered accessories overnight while you sleep. The TW500 model takes this further, offering wireless charging capabilities in addition to the standard USB port.
The USB ports typically deliver a standard charging current, suitable for most devices. However, charging speed may vary depending on your device and its charging requirements. Ensure your device’s charging cable is securely connected to both the radio and your device for optimal charging performance.
Using the USB Ports for Device Charging
To utilize the USB charging feature on your Timex clock radio, simply connect a compatible USB cable to the port located on the unit – often on the rear or side panel. Then, connect the other end of the cable to your smartphone, tablet, or other USB-powered device. Charging will commence automatically once connected, providing a convenient overnight charging solution.
It’s important to note that the USB port provides a standard charging current. While suitable for most devices, it may not offer the fastest charging speeds available. Ensure a secure connection for optimal charging. The radio can continue to operate normally while your device charges.
Wireless Charging (TW500 Model Only)
The Timex TW500 model boasts integrated wireless charging, offering a cable-free charging experience for Qi-enabled smartphones. To charge wirelessly, place your compatible device directly onto the designated charging pad located on top of the clock radio. A successful connection is usually indicated by a charging icon on your phone’s screen.
Ensure your device is properly aligned with the charging pad for efficient power transfer. Cases thicker than 5mm may interfere with charging. The wireless charging feature operates while the radio functions normally. Note that charging speeds may vary depending on your device and its wireless charging capabilities.
Display and Customization
Timex clock radios offer customizable display settings to suit your preferences. Adjusting the brightness is simple using the dedicated dimmer control, allowing you to create a comfortable viewing experience in any lighting condition. Lowering the brightness can also conserve energy and minimize sleep disruption. The Amber-Glo custom display provides a warm, easy-to-read illumination.
This unique display technology offers excellent clarity without being overly harsh. Some models feature multiple brightness levels, providing granular control over the display’s intensity. Experiment with different settings to find the optimal level for your bedroom or workspace. A dimmed display promotes better sleep quality.
Adjusting Display Brightness (Dimmer Control)
The dimmer control on your Timex clock radio allows you to easily adjust the display’s brightness to your liking. Typically, a dedicated button or series of buttons labeled “Dimmer” or a sun icon controls this function. Pressing the dimmer button cycles through various brightness levels – High, Medium, Low, and Off. Some models offer a wider range of adjustments for precise customization.
Experiment with each level to find the setting that’s most comfortable for your eyes and minimizes light pollution during sleep. A lower brightness level is ideal for nighttime use, while a higher setting is suitable for daytime viewing. Remember the selected brightness level is retained even after power outages due to battery backup.
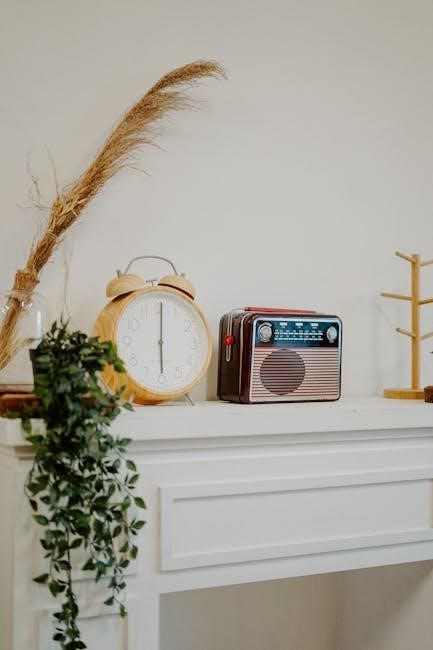
Amber-Glo Custom Display Explained
Timex’s Amber-Glo display technology is designed for optimal readability while minimizing sleep disruption. Unlike traditional blue or white backlit displays, the amber hue emits a warmer light spectrum, which research suggests has less impact on melatonin production – a hormone crucial for regulating sleep cycles. This custom display offers a clear view of the time without the harsh glare often associated with other clock radios.
The Amber-Glo display also features a dimmer control, allowing further customization to suit individual preferences and ambient lighting conditions. This combination of warm color and adjustable brightness ensures a comfortable viewing experience, promoting restful sleep. It’s a key feature, especially in models like the T1305BX intended for hotel use.
Troubleshooting Common Issues
Encountering problems with your Timex clock radio? Several common issues have straightforward solutions. Radio reception problems can often be resolved by repositioning the unit or checking the antenna connection. If the alarm isn’t sounding, verify the alarm is enabled, the volume is set appropriately, and the correct wake-up source (radio or buzzer) is selected.
USB charging not working? Ensure the connected device is compatible and the USB port is functioning correctly. For display issues, try adjusting the dimmer or, as a last resort, perform a reset (refer to your model’s specific instructions). If issues persist, checking the battery backup is crucial, as low batteries can cause malfunctions.
Radio Reception Problems

Experiencing static or weak signal strength? Poor radio reception is a common issue. First, ensure the FM antenna is fully extended and properly positioned. Try relocating the clock radio away from potential sources of interference, such as other electronic devices or metal objects. Walls and buildings can also obstruct signals; experiment with different locations within the room.
Check the antenna connection to the radio, ensuring it’s secure. If using an external antenna, verify its functionality; Scanning for stations again can sometimes improve reception. Remember that FM radio quality depends on your geographical location and distance from broadcast towers. Consider a higher-quality antenna if problems persist, and avoid placing the radio in a basement or enclosed space.
Alarm Not Sounding
If your Timex clock radio alarm fails to activate, several factors could be at play. First, confirm the alarm is properly set and enabled – ensure the alarm indicator light is illuminated. Verify the volume is turned up sufficiently; a muted radio or low buzzer volume won’t wake you. Check the alarm mode selection (radio or buzzer) to ensure it matches your preference.
Low battery power can also prevent the alarm from functioning, even with a power adapter connected. Replace the batteries as a precaution. If using the radio alarm, confirm a station is properly tuned and available. Finally, a reset of the clock radio might resolve software glitches preventing alarm activation. Double-check all settings after resetting.
USB Charging Not Working
If your Timex clock radio’s USB port isn’t charging devices, begin by verifying the connection. Ensure your USB cable is securely plugged into both the radio and your device. Try a different USB cable to rule out a faulty cable as the issue. Confirm your device is compatible with the USB port’s output – some devices require higher wattage;
For models like the TW500, ensure the device is correctly positioned for wireless charging. If still not working, try a different outlet to eliminate power source problems. A reset of the clock radio may resolve internal issues. Inspect the USB port for any visible damage or debris that could obstruct the connection.
Display Issues and Resetting
If the Timex clock radio display is dim, flickering, or showing incorrect information, first adjust the dimmer control to ensure it’s not set to the lowest level. For models with an Amber-Glo Custom Display, experiment with different brightness settings. If the display remains problematic, a reset might be necessary.
To reset, unplug the clock radio from the power outlet. Wait for approximately 60 seconds, then plug it back in. This often clears minor software glitches. If a full reset doesn’t resolve the issue, check the battery backup – a low battery can sometimes cause display anomalies. If problems persist, consult the warranty information.
Battery Backup Functionality
Timex clock radios often include battery backup to safeguard your settings during power outages. This ensures the time remains accurate and your alarms will still function as programmed, even without mains electricity. The T1305BX model specifically mentions included batteries for this purpose.
To install or replace batteries, locate the battery compartment – typically on the back or bottom of the unit. Use the correct battery type (usually AAA or AA, check your model’s specifications). Battery backup isn’t intended for continuous operation; it’s a temporary solution. Regularly check battery levels to maintain reliable backup functionality and prevent settings loss.
Installing and Replacing Batteries
To install batteries, first locate the battery compartment, usually found on the radio’s underside or rear panel. Gently open the compartment cover. Refer to the diagram inside, if present, to ensure correct battery polarity – matching the positive (+) and negative (-) markings. Typically, Timex clock radios utilize AAA or AA sized batteries; confirm the required type in your model’s documentation.
When replacing batteries, always use a full set of new batteries. Mixing old and new batteries can reduce performance and potentially damage the radio. Dispose of used batteries responsibly, following local regulations. Ensure the compartment cover is securely closed after installation to maintain a stable power connection and prevent accidental dislodgement.
Benefits of Battery Backup
The battery backup feature in your Timex clock radio provides uninterrupted operation during power outages. This ensures your alarm will still function, preventing you from oversleeping even when the electricity is down. It also preserves your saved settings, like time and radio presets, eliminating the need for re-configuration after a power interruption.
This is particularly useful for maintaining a consistent wake-up routine and avoiding disruptions. While battery life varies depending on usage and battery type, a fresh set typically provides several hours of backup power. Regularly checking and replacing the batteries ensures continued reliability of this essential feature, offering peace of mind and dependable performance.
Advanced Features (Model Specific)
Certain Timex clock radio models, like the TW500, offer enhanced functionalities beyond standard operation. The Sleep Timer function allows you to set a duration after which the radio automatically turns off, ideal for falling asleep to music. FM Presets, available on models like the TW500 and T232B, enable saving up to ten of your favorite radio stations for quick and easy access.
These features personalize your listening experience and provide added convenience. The TW500’s wireless charging capability is another advanced option, simplifying device charging. Refer to your specific model’s documentation for a complete list of available features and detailed instructions on how to utilize them effectively.
Sleep Timer Function
The Sleep Timer feature on your Timex clock radio allows the radio to automatically power off after a pre-set duration, conserving energy and preventing continuous playback throughout the night. This is particularly useful for those who enjoy falling asleep to music or talk radio. Activation varies by model, but generally involves pressing a dedicated “Sleep” button or navigating through the radio’s menu system.
You can typically select from multiple timer intervals, such as 15, 30, 60, or 90 minutes. Once activated, the radio will gradually decrease volume before shutting off. To deactivate the sleep timer, simply press the “Sleep” button again or turn the radio off and on. Consult your specific model’s manual for precise instructions.
FM Presets ─ Saving Your Favorite Stations
Timex clock radios, particularly the TW500 model, offer the convenience of saving your frequently listened-to FM radio stations as presets. This eliminates the need to manually scan for stations each time you want to listen. To save a station, first tune to the desired frequency using the tuning controls. Then, press and hold the “Preset” or “Memory” button until a preset number appears on the display.
Repeat this process for up to 10 stations (depending on the model). To recall a saved station, simply press the “Preset” button followed by the corresponding preset number. The radio will instantly tune to your selected station. This feature streamlines your listening experience and provides quick access to your preferred content.
Safety Precautions
To ensure safe operation of your Timex clock radio, please adhere to the following precautions. Avoid using the radio in excessively humid environments, such as bathrooms, to prevent electric shock. Do not expose the device to direct sunlight or extreme temperatures. Keep the radio away from flammable materials and liquids.
Never attempt to disassemble or repair the radio yourself; instead, contact qualified service personnel for assistance. Ensure the power cord is not damaged and is properly connected to a grounded outlet. Do not insert any objects into the radio’s vents, as this could cause damage or electric shock. Always unplug the radio during lightning storms or prolonged periods of non-use.
Cleaning and Maintenance
To maintain the appearance and functionality of your Timex clock radio, regular cleaning is recommended. Always disconnect the radio from the power outlet before cleaning. Use a soft, dry cloth to wipe the exterior surfaces; avoid harsh chemicals or abrasive cleaners, as they may damage the finish. For stubborn stains, lightly dampen the cloth with water and gently wipe the affected area.
Clean the display with a soft, lint-free cloth. Periodically check the USB ports for dust accumulation and carefully remove it with a dry cloth or a can of compressed air. Avoid getting any liquid inside the radio. Ensure the radio is completely dry before reconnecting it to the power outlet. Proper care will extend the life of your Timex clock radio.
Warranty Information

Timex clock radios are warranted against defects in materials and workmanship for a period of one year from the date of original purchase. This warranty does not cover damage resulting from misuse, abuse, accidents, or unauthorized modifications. To make a warranty claim, please contact Timex customer support with proof of purchase, including the date and place of purchase.
The warranty service may involve repair or replacement of the defective product, at Timex’s discretion. This warranty is limited to the original purchaser and is not transferable. Timex disclaims all implied warranties, including merchantability and fitness for a particular purpose. See the included warranty card for complete details and limitations.